Wednesday, July 24, 2013

1 Cake and 200 Cupcakes!

 What a busy year this has been! I hadn't realized how long it had been since I last posted on the blog! This spring and summer have been amazing! We haven't had rain in a few weeks, so I've been watching my garden flourish. I've spent much of my summer outdoors, working in the sunshine and tending to my garden. My family has been enjoying the fruits of my labor with fresh snow peas, beets, zucchini, and fresh herbs! My tomatoes are beginning to ripen and everything is on track for an amazing harvest.

Last weekend, I also had the joy of witnessing two dear friend renew their wedding vows. After 10 years of marriage, they made the decision to say I do to each other again. What a blessing they are in my life, and a true inspiration. For the celebration, my sister in law, Kristine, and I teamed up to make nearly 200 cupcakes - 1/2 chocolate and 1/2 vanilla bean, both topped with a vanilla buttercream piped to look like a rose blossom. We chose 4 colors based on the colors of the ceremony - pale pink, fuchsia, coral, and lavender. We knocked them out in a day, but it was rather labor intensive! My sister in law is also pregnant, so I'm sure she was even more sore than I was after that day. Here are a few pictures of the final cupcakes, displayed at the ceremony.
The display table, before the cake was placed


 On the side, I managed to put together a small cake as a surprise for the bride and groom. I made a 4 layer milk chocolate cake, brushed with a Kahlua simple syrup, filled with a rich chocolate ganache, and topped with a vanilla buttercream.  I tinted the icing to a warm champagne color, then piped white icing in a whimsical paisley design. To finish the base, I wrapped a rusty colored burlap ribbon, and tucked a crocheted lace ribbon under the edge. The lovely cake topper was put together by my friend and sister of the bride, Aubrey. She did an amazing job on it! After the cake topper was placed, I scattered individual hydrangea blossoms around the base and top of the cake. Here is the finished cake!
The completed cake!
 

Friday, December 14, 2012

Company Christmas Party

In December of 2012, I was asked to prepare food and organize our company Christmas party. While I admit it was a lot of work, I love the reward of seeing everything put together and hearing how much everyone enjoyed it! My friend Mary was a gracious host, opening up her home as the venue and helping prepare some of the food! Here are a few pictures of the food from the party...


Monday, November 12, 2012

Rotary Auction Dessert

Since my husband is a Rotarian, I was asked to make a dessert for the annual Rotary Gala, which includes a silent and live action, as well as a meal. The desserts made were auctioned off by the table! Thought I would share a picture of mine - a Rich Chocolate Cheesecake! I piped semisweet chocolate into tree shapes, then brushed them with Lusterdust (and edible metallic glitter of sorts). I used a chocolate ganache to attach them to the cheesecake. Here is how I made the trees...
Chocolate must be tempered when you attempt to pipe it. The easiest way is to chop the chocolate you want to melt, take 3/4 of it and place in a microwave safe bowl. Microwave in 20 second increments, stirring in between, until chocolate is melted. Immediately dump in the remaining 1/4 of the chocolate and stir until it melts. Once melted, I just pour it into a plastic resealable bag fitted with a small, plain tip (1/8"-1/4" opening) and pipe the chocolate onto a sheet tray lined with parchment paper. It only took 20 minutes or so for my trees to set up. I didn't attach the trees until shortly before service, I didn't want the moisture of the cake to wilt the trees.

Here is a picture!
Creamy Chocolate Cheesecake

Monday, October 15, 2012

Roasted Creamy Tomato Soup

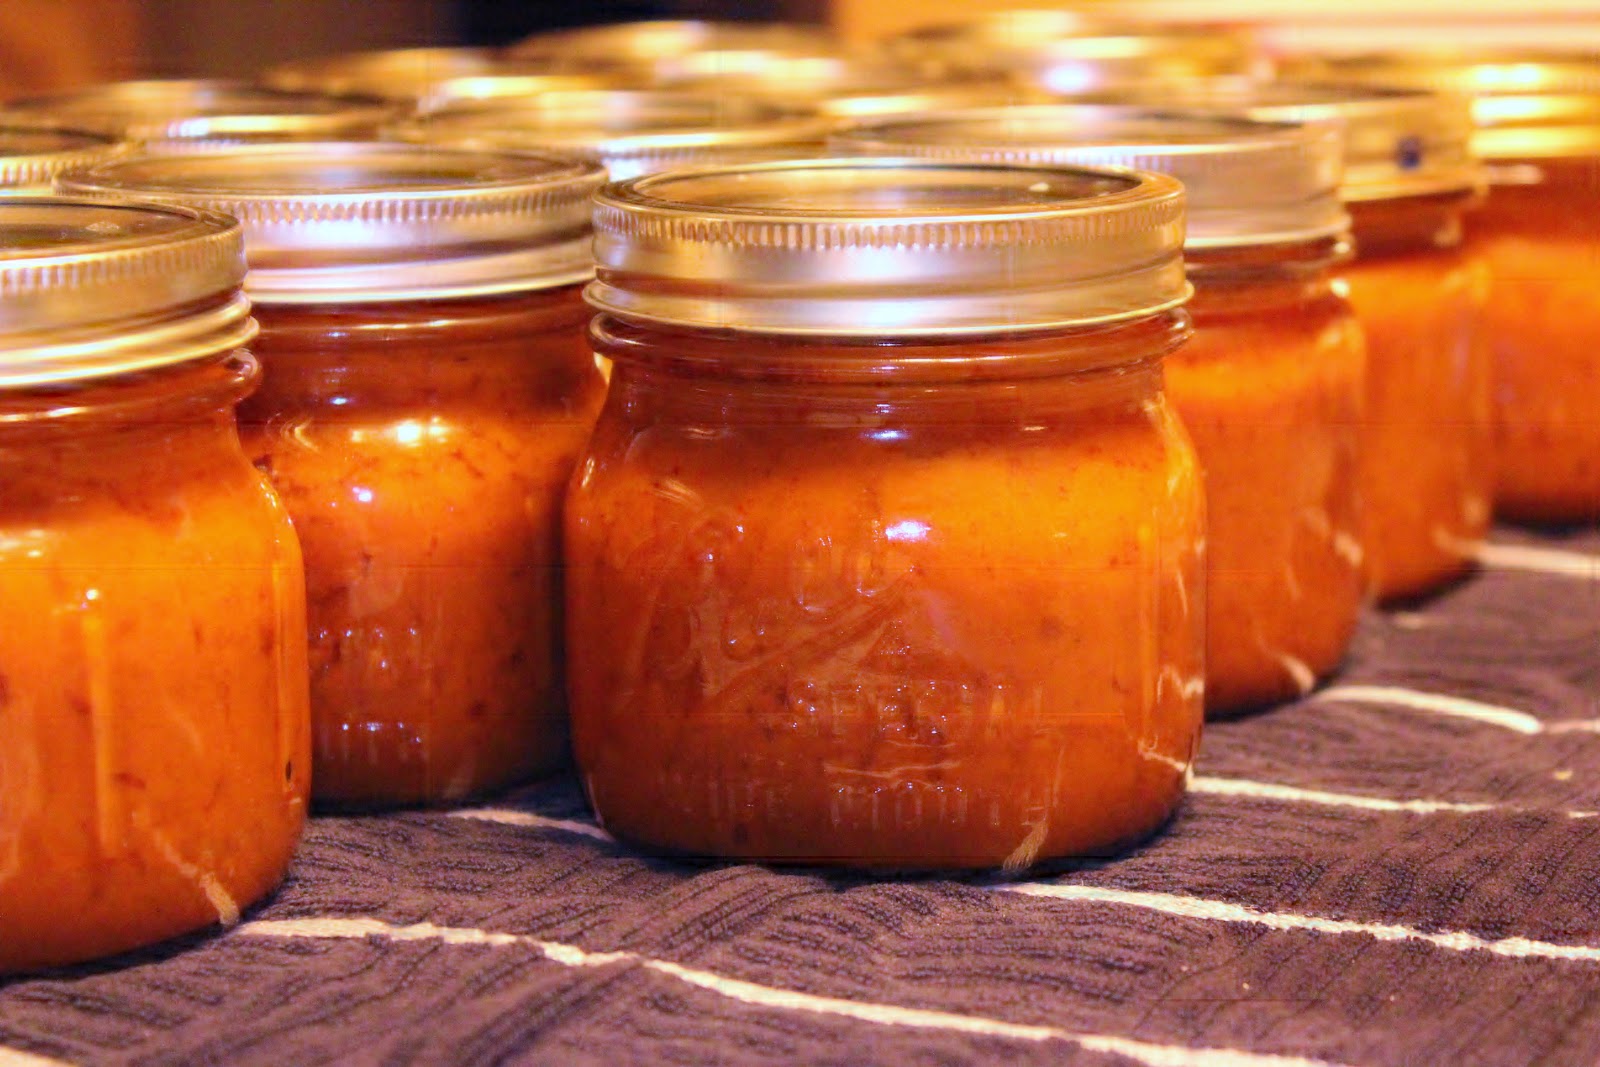
With all the fresh heirloom tomatoes coming out of my garden, I decided to make my own tomato soup. This recipe made 14 1/2 pints, which I canned in my pressure canner. Here is what I did...


Roasted Creamy Tomato Soup ©
Roasted Creamy Tomato Soup

12 1/2 lbs mixed tomatoes (I used heirlooms in yellow, purple, green, red, and brown, along with Roma tomatoes)
6 large sweet onions
2 bulbs garlic
1/4 cup + 1/4 cup balsamic vinegar
1/4 cup cream sherry
3 quarts chicken stock
3 tablespoons agave syrup (or other sweetener), OPTIONAL
Extra virgin olive oil
Salt/pepper
2 bay leaves
1/2-1 teaspoon smoked paprika
1 teaspoon sweet paprika
1/2 teaspoon nutmeg
 
Preheat oven to 425 degrees. Halve or quarter tomatoes, place on sheet pans, drizzle with a little olive oil, season with salt and pepper, and roast in oven until soft and lightly caramelized (around 30 minutes). Because this is a bigger batch, I used 5 sheet trays. This step can be done ahead of time. I spread this out over a couple of days, as my tomatoes ripened.
Cut onions in half and slice. I used a food processor to make quick work of this! In a large saucepan, heat 1 tablespoon of olive oil, then add onions. Immediately add salt and cook over low/medium heat until unions are soft and caramelized. Add cream sherry and 1/4 cup balsamic vinegar to the pan and cook an additional 5 minutes. This step can also be done ahead of time.
Slice off tops of garlic bulbs to expose the cloves. Place in a small pan, drizzle with olive oil, and roast in a 425 degree oven until golden brown and caramelized, about 30 minutes. Allow to cool, then squeeze out the cloves. (Once again, this step can be done ahead of time!)
In a large stockpot, combine roasted tomatoes, caramelized onions, and roasted garlic. Add chicken stock. Bring to a boil, then reduce to a simmer. Add bay leaves, sweet and smoked paprika, and nutmeg. Simmer over medium-low heat for about 45 minutes. Remove bay leaves. Using a food processor, puree soup in batches. Strain through a coarse strainer to remove seeds and tough pieces of skin. Stir in remaining 1/4 cup of vinegar and cook for 5 minutes. Taste for seasoning...I added the agave just to enhance the tomatoes sweetness, but it is to your taste!  Season with salt and pepper.
Ladle into hot, sterilized pint jars (I like the look of wide-mouth stout pint jars), clean rims, and apply sterilized caps. Follow your manufacturers instructions for your pressure canner. Process at 11 lbs pressure, 60 minutes for pints, 70 minutes for quarts.

When you are ready to open up a jar, just bring to a boil in a saucepan, reduce heat, and add cream or milk to taste. Freshly sliced basil sprinkled on top would be delicious!
 
I hope I remembered everything, but you can adjust the flavors according to your taste.
 
Enjoy!  
 

Tuesday, August 21, 2012

Blackberry Pie

Since it's such a great time of year for pies, I thought I would share my recipe for Blackberry pie!
First off, the crust. There are two types of crust - flaky and mealy. Mealy crust are used for single crust pies, such as pumpkin pie to prevent a soggy crust. Most other pies, usually with top and bottom crust, require a flaky crust.

Here is my recipe:

Pie Crust
2 cups flour
1 cup shortening
1 tablespoon sugar (optional)
1/2 cup ice cold water

Measure water, then add a few ice cubes. Set aside. Stir together flour and optional sugar, then cut the shortening in. Make sure that you leave the shortening in large pieces, about the size of raisins. This is what makes a flaky crust!
Drizzle the water over the mixture and gently stir - don't over mix or your crust will be tough. Stir just enough for the water to moisten the flour. I usually use my hands to press it together so I don't over mix. Shape into a disk and wrap in plastic wrap. Chill. (The disc can also be placed in a freezer bag and frozen for a couple months. Just place in the fridge the night before to thaw). When ready to use, remove from fridge, cut in half. Return one portion to fridge while you are rolling out the first. Gently form into a round, then lightly dust with flour, but don't overdo or crust will be tough. Gently roll until dough is about 1 inch larger than pie plate. Place crust into a greased pie plate (9 inch). Make sure all excess flour is brushed off. Don't stretch the crust, or it will shrink during baking. Add desired filling. Follow same procedure for rolling out the second piece. Lay over pie, then roll all the excess under and shape to form an even crust. Shape as desired. I cut a few slits in the top to allow the steam to escape so the crust doesn't become soggy.

I like the little touch of sugar, because it makes the crust brown a bit better. If you are using it for a savory pie, such as chicken pot pie, I would omit it. You can also use an egg wash over the top ( 1 egg yolk and a few tablespoons of milk) to make the top glossy. Just brush it on sparingly, so you don't end up with lumps of scrambled eggs.
To make a mealy crust, simply cut recipe in half and work the shortening into the flour until it resembles breadcrumbs, then continue as above.

For the filling, I use 5-6 cups of berries, depending on how full you like your pies.

Blackberry Pie

5 cups fresh blackberries
1 cup sugar (Use less for sweet berries, more for tart ones)
2/3 cup flour
1/4 teaspoon nutmeg
1 Tablespoon Lemon juice
1/2 teaspoon vanilla
I recipe pie crust
Gently stir together all ingredients. Allow to sit for a few minutes for the berries to release some of their juices, then stir again. All the sugar and flour should be moist.

Bake at 350 degrees for about an hour, or until crust is lightly golden and fruit filling is bubbling.

Enjoy! (sorry for the lack of pictures, I'm having a few computer issues!)

Wednesday, May 30, 2012

Maple Cinnamon Glazed Salmon

I know what your first thought is after reading the title... shouldn't that be in oatmeal? Well, by making this glaze and brushing it onto your salmon, you get a beautiful, sweet crunchy crust on pan seared salmon! I tried this last night with a side of jalapeno polenta and it was delicious! My 3 1/2 year old wolfed it down. I'm so blessed to have access to an amazing amount of salmon from our fishing trip last year - every person on the boat limited out on King Salmon! We go again in a couple of months, so I am trying to use up all of last years fish. I hope we have the same abundance of fish that we had last year! Maybe some more halibut in there too...

Here is my recipe...This made enough to coat 2 or 3 salmon steaks. It is so quick to make that you can always make a little more if you run out, but I hate to waste it once it's contaminated with the fish. I used King salmon, which by far exceeds the Atlantic salmon for flavor and texture!

Maple Cinnamon Glaze for Salmon

2 Tablespoons of Pure Maple Syrup
1 teaspoon Dijon Mustard
1/2 teaspoon ground cinnamon
1/4 teaspoon black pepper
1/4 teaspoon salt

Whisk ingredients together until smooth. Using a a silicone brush, "paint" the mixture onto one side of the salmon. Place salmon glaze side down into a medium-hot grill pan. Paint the other side of the fish while in the pan - this eliminates wasting the glaze! Cook time depends on the thickness of the fish. I usually judge when to flip by how easily it releases from the pan and my looking at the side of the fish. it should be opaque almost halfway up the sides before you flip. You can serve additional glaze on the side, just make sure that it hasn't been mixed with the raw salmon.


Maple Cinnamon Glazed King Salmon
This glaze would be amazing on many thing! I think scallops and shrimp would be delectable too! I would love to hear what you think and if you try it on any other seafood or chicken!
Enjoy!

Monday, April 30, 2012

Tapioca Pudding

Tapioca. What is it? It is the starchy root of the cassava plant, dried and formed into small pearls. Quick tapioca has been ground down to small chunks and works best for thickening fruit pies. Small Pearl Tapioca is ideal for tapioca pudding because they are the perfect size. Large pearl tapioca is what is used in making bubble tea.
First off, I really enjoy tapioca pudding! Not too sweet or heavy, just the right creamy and textured treat! It's so hard to find a good recipe, so today I finally just created one to my liking... Here is my recipe:

Tapioca Pudding

2 eggs
1/2 cup sugar
4 cups milk
1 cup  Small Pearl Tapioca
Pinch of nutmeg
1 teaspoon vanilla
1 tablespoon butter (optional)

Combine the eggs and sugar, beat until smooth. Whisk in milk, then stir in tapioca and nutmeg. Allow to soak under refrigeration for at least 30 minutes, I find an hour or two makes the pearls more tender.
After soaking, cook over medium heat, stirring constantly, until mixture comes to a boil. Boil for about a minute, until pudding has thickened. It will thicken more on cooling. Remove from heat and stir in vanilla and butter. May be enjoyed warm or chilled.

This version beats the store-bought version hands down in texture and flavor! And another perk: it's gluten free! This does get fairly thick, so if you prefer it less thick, simply cut back the tapioca by as much as half. Enjoy!


Beautiful Tapioca Pudding made with fresh farm eggs


Thursday, April 26, 2012

Wedding Cake

Well, once again, life has taken over and prevented me from having extra time to post. We've survived a wedding, my little one with the stomach flu, and the birth of my new niece Lily. I seem to have injured my back and my husband strained a muscle in his leg last night and is currently on crutches. Life sure doesn't slow down...
On the bright side, I'm getting ready to start my gardening season. I am so excited to cook some great meals with what I harvest from my garden!
I know many of you asked about how the cake turned out, so I wanted to post a picture of the final product. Being the perfectionist that I am, I could see many flaws in the executions, but all in all, I believe it turned out pretty well! The flowers are shaped from gum paste, which is similar to fondant, but does not absorb moisture from the air. Each flower took 2 1/2 hours to make. I formed the centers and shaped the stamens, putting a small piece of wire into each, so I could attach it to the center. The wire is the only non-edible part of the flower as I couldn't find anything thin, strong, and flexible to use. I then had to roll, shape, and cut each petal, then form them and allow them to dry. Once dry, I laid out my petals and painted them with a mixture of vodka and food color gel. This allowed the flowers to dry, versus re-hydrating by using water. Once the 2 coats of "paint" dried, I was able to assemble the tulips using meringue powder and water as glue. They were propped up to dry, then the glue was touched up for pieces that didn't adhere.The cake was a devil's food cake, filled with a cherry-marshmallow filling, iced with a lactose free icing and topped with fondant.   I baked the cakes one day, then filled them the next. Day three, I was able to apply 2 coats of icing, chilling between each coat. Then came the fondant. It is a challenge to work with! The fondant had to be tinted ivory, since it was white. That was a workout! The fondant must be rolled to the right thickness - too thick, it would crack. Too thin, it would tear and everything underneath would show through. Once the fondant is on the cake itself, you have to work quickly so it doesn't dry out while you are stretching and smoothing the fondant over the icing. The heat of my hands was melting the icing underneath, making it very difficult to have a smooth finish. Once the fondant is on the cake, you cannot refrigerate it or the water within the fondant will bead up on the surface. After the fondant was on, I used a navy ribbon around the base (covers up many mistakes!) and secured it using small pins. The flowers were not actually attached to the cake, but just laid on there in a composed way.

I hope it was both visibly and tastefully appreciated!

The cake!

Monday, April 2, 2012

Spring IS Coming!

Hi everyone! I apologize for the scarcity of my posts lately... Life has been so hectic! And upcoming wedding in the family has taken some time away, as I am making the cake. I will post pictures on here of the final product. I hope it turns out!
On the AWESOME side, my husband is finished with his chemo and appears to be gaining back some strength. 2012 started off a little rough for us, but we are hopeful for the future and that the cancer stays away! Thank you all for your support and prayers, we really appreciated them!

I don't know how the weather has been in your area, but our weather in the Pacific Northwest has been wet and cold! This presents a problem with my gardening... you can't cultivate mud! At least now easily... Sunshine has been hard to come by, but we are looking forward to some nicer weather soon!

So far, I am only perusing my seed catalogs to choose what I will be planting for this year. I love organic heirloom varieties for many things, as I can save seeds (and money) for next seasons plantings. Sometimes I feel like I had a great green thumb, but after last year's terrible crop, I am afraid it might be withering a little. I am researching everything I am planning to plant to find out what the best methods of planting are and how to get the highest yield from each plant. And, I hope to beat the slugs to my harvest this year!

I would love to hear - what are your favorite foods to grow and do you have any tips and tricks to make the most of the gardening season?

Last year's lettuce... this was as big as it got...

I am being optimistic... Spring IS coming. And I will be ready, with my gardening gloves and my seeds in hand!

Wednesday, February 29, 2012

Rosemary and Red Pepper Hummus

Hummus is a middle eastern spread. It dates back to ancient Egypt, Syria, and Greece - 7000 years ago! The word "hummus" is the Arabic translation of "chickpea". "Garbanzo" is the Spanish translation of the word "chickpea", which is what we commonly call the bean now days. This is my recipe for hummus...

Rosemary and Red Pepper Hummus

2 cups cooked garbanzo beans (chickpeas)
2 tablespoons tahini (sesame seed butter)
juice of 1 large lemon (to taste)
1 small to large roasted red pepper, depending on preference
2 garlic cloves, crushed
1 teaspoons fresh rosemary
1/4 cup water (more or less, depending on texture)
1/4 cup Extra Virgin olive oil
salt/pepper

In a food processor, add beans, tahini and 1/2 the lemon juice. Pulse until mixture is finely chopped. Add the red pepper, crushed garlic cloves, rosemary, and 1/2 the water. With processor running, add in the olive oil and puree until smooth. If mixture appears very thick and isn't processing smoothly, a little more water. Once pureed, taste for flavor. The garlic will seem strong, but will mellow after resting. Add more lemon juice to taste. I like to let it sit in the refrigerator overnight to let the flavors blend, though it isn't necessary. To serve, spread into serving dish, drizzle with 1 additional tablespoon of olive oil, and top with a few sprigs of fresh rosemary. Serve with veggies, pita bread/chips, or even fresh fruit (such as pears). Hummus is also great served as a spread on sandwiches and wraps.

You can use canned garbanzo beans for the recipe above, just make sure you rinse them well. I used dried beans by simply soaking them overnight in water, then draining (to make sure they are free from dirt), adding to a large saucepan, topping with fresh water, and simmering until tender.  I try to cook up an extra bit to use for other meals. Roasted Garbanzo beans are a great snack!
Rosemary and Red Pepper Hummus
The picture above is a recent double batch that I made for a bridal shower. I was short on red peppers, so I was only able to add 1/2 the amount I normally would have. It was still delicious, though! And the recipe is fairly flexible - up the garlic or try adding sundried tomatoes or other flavorings. Hummus is a healthy alterative to other dips and spreads. It is full of fiber and healthy oils. Because beans are fairly inexpensive, this is a low-cost alternative to pre-made dips.

I hope you enjoy!

Thursday, February 23, 2012

Coconut Syrup

For those of you that have been to Hawaii, you have probably had coconut syrup to top your waffles and pancakes. For those of you that haven't, you've missed out! While I have never been to Hawaii, I do know people that have and they brought back a bottle of this fabulous nectar. I love this syrup, but found that the ingredients contained soybean oil, much to my dismay... So I set about creating my own recipe to mimic it. I can say it is pretty tasty!
Here is my recipe...

Coconut Syrup

1 cup sugar
1/2 cup water
2 tablespoons coconut oil
1/8 teaspoon lemon juice
3 tablespoons Creamed Coconut (or more to taste)
pinch of salt

Combine all ingredients in a small saucepan. Sitr, while bringing just to a boil to dissolve sugar. Cool, then serve over waffles, pancakes, ice cream, or dessert of your choice! Makes about 1.5 cups
Please note that I used CREAMED COCONUT, not Cream OF coconut.
Also, if you use extra virgin coconut oil, you can just whisk it in after you remove the syrup from the heat, since it has a higher risk of burning.
After making, store in the refrigerator. If syrup is too thick, simply rewarm!


Coconut Syrup

I hope you enjoy! Those of you that have been to Hawaii and had the actual syrup, I would LOVE to hear your feedback! Well, I'd love to hear feedback from everyone!

Thursday, January 19, 2012

Not Your Average Split Pea Soup

I love comfort foods, especially soups, on a cold winter day. Since we have been getting snow for the past week, I thought I would revisit an old favorite. When I think of split pea soup, I always thing of using a ham bone and leftover ham. My version uses bacon as a twist, with no ham bones involved! Here is my recipe:

Split Pea Soup with Bacon

2 cups split peas
4 rashers bacon
2 Tablespoons bacon fat (reserved from cooking rashers)
1 cup chopped celery (about 2 large stalks)
1 large garlic clove, minced
1 small shallot, minced
1/4 cup dry white wine
4 cups chicken, turkey, or veggie stock
1 Tablespoon Dijon mustard
1/4 teaspoon thyme
Salt and Pepper to taste
1/4 cup chopped parsley
Sour Cream or Creme Fraiche to serve

Soak split peas for several hours to overnight. I put mine on to soak in the morning and they were ready by evening. Make sure you give them lots of water, because they plump up dramatically!
Cook rasher of bacon until crisp, reserving fat. Cool, crumble and set aside.
Heat bacon fat in a large saucepan. Add celery along with a pinch of salt and cook for a couple of minutes. Add, shallot and garlic and cook for about 30 seconds, then add white wine. Cook until wine reduces almost in half, just a couple of minutes. Add drained split peas along, along with thyme and Dijon mustard. Cook until peas break down and soup begins to get creamy. Taste for seasoning and season with salt and pepper. Remove from heat and stir in parsley and reserved crumbled bacon. Serve with a dollop of sour cream or creme fraiche.


Split Pea Soup with Bacon, served with Sour Cream

I served mine with some cheddar cornbread muffins, which was the perfect compliment! I hope you enjoy this recipe for a classic dish - with a twist!

Wednesday, January 4, 2012

Bailey's Chocolate Cheesecake Mousse

Well, it was requested for me to share the recipe for the dessert I made for my little family's New Year's Day meal. I was looking for a rich dessert that was easy to make, but still rich and decadent. This fit the bill! It took very little time to put together, but looked like I had spent quite a bit of time on it! The texture was a cross between a mousse and a cheesecake, the flavor rich with Bailey's, chocolate, and cheesecake. And best of all, it's a no-bake dessert! Here is the recipe...

Bailey's Chocolate Cheesecake Mousse

4 oz cream cheese, softened
1/4 cup sugar
5 tablespoons Bailey's Irish Cream
1 1/2 cups semi-sweet chocolate, chopped (semi-sweet chocolate morsels may be used too)
1 Tablespoon butter
1 cup heavy cream, whipped to firm peaks

Melt Chocolate, butter, and 1 tablespoon Bailey's over a double boiler. Set aside. Combine the cream cheese and sugar, beat to combine. Slowly add in 4 tablespoons of Bailey's and stir until smooth and creamy.
Slowly combine the chocolate mixture with the cream cheese mixture - it will thicken quickly! Stir in 1/4 of the whipped cream, then fold in the remaining until combined. Spoon into serving dishes and top with chocolate curls (use a vegetable peeler on the side of a chocolate bar). Makes 6 servings.

Enjoy!
Bailey's Chocolate Cheesecake Mousse
I wish you all a joyous 2012, and I look forward to sharing more tips, recipes and fun with all of my readers!

Thursday, December 29, 2011

Whipped Orange Nutmeg Butter

I apologize for the lack of post lately! I have been immersed in the holidays, as well as tending to our litter of puppies born October 12.... all 15 of them!
I hope my photography skills will begin to improve as well! I received a DSLR camera from my husband as a Christmas present! I am looking forward to higher quality photos to put on my blog!

For dinner tonight, I decided to roast some sweet potatoes. I simply make a couple of small slits in the sweet potatoes, then place them in a 350 degree oven until they are tender. I usually put a piece of foil underneath them while they roast, since they will caramelize and "ooze" a bit of goodness onto the bottom of your oven.

To make the whipped butter, I decided to try something my sister had told me - whipping butter with coconut oil. But, as is my nature, I couldn't make plain butter! Here is the recipe...

1/4 cup butter, softened
1/4 cup coconut oil (I didn't use extra virgin)
Pinch of salt (I used Himalayan pink salt, ground to a powder in a mortar and pestle)
1/2 teaspoon freshly grated orange zest (I used satsuma zest)
1/4 teaspoon freshly grated nutmeg

Place butter in a bowl, and beat for a second to smooth the texture out. Add the coconut oil, and whip together until fluffy looking.  Season to taste with salt. You can stop here and have just a plain whipped butter. Simply stir in the flavors (zest and nutmeg) and scoop into a serving dish. Chill until service time. For softer butter, simply remove from the fridge about an hour before service.

Coconut oil is a very healthy oil and by mixing it with the butter, it still retained the buttery flavor and creamy texture. The salt is optional, but I felt that it made it taste like true butter. As with most compound or flavored butters, you can change up the flavor combinations.  Different citrus zests, herbs, spices - endless possibilities!
Whipped Orange Nutmeg Butter

Tuesday, December 6, 2011

Red Hot Cinnamon Candy Popcorn

I thought some of you might enjoy this... It's very festive for the holidays! Though it's not my recipe, I did alter it slightly...

In case any of your are interested, I thought I would share a favorite recipe of mine... I didn't make this up, it's out of a cookbook, but it's a fun change from your normal caramel corn!
Red Hot Cinnamon Candy Popcorn
8 quarts popped popcorn
12 oz package red cinnamon candies
+ enough sugar to fill up a 2 cup measure
1 cup butter
1/2 cup corn syrup
1/2 teaspoon baking soda
Spread Popcorn onto a lightly buttered roasting pan; bake at 250 degrees while preparing syrup. Pour cinnamon candies into a 2 cup measure, then fill remainging space to the top with sugar. Place in a heavy saucepan and add butter and corn syrup. Bring to a boil and boil for 5 minutes. Remove from heat and carefully stir in baking soda. Pour over popcorn and stir to coat. Bake in a 250 degree oven for 1 hour, stirring every 15 minutes. Remove from oven and let cool. Break apart and store in an airtight container.
I hope you all enjoy! I love this recipe!

Sunday, November 27, 2011

Turkey and Apple Cranberry Sauce

I love the holidays and the delicious food that comes with them! While my Thanksgiving was a little late, it was still wonderful! I took the time to brine my little 9lb turkey and what a difference it made!  Even though I misjudged time and overcooked the turkey, it was still moist and flavorful. I made the brine the day before I cooked the turkey and allowed it to marinate overnight, about 12 hours. Here is my recipe…

Turkey Brine 
¾ gallon water
1 cup apple cider
1 ¼ cup salt (canning and pickling salt is perfect)
¼ cup brown sugar
½ cup white vinegar
1 tablespoon peppercorns
1 tablespoon allspice berries
2 tablespoons pickling spice
10 fresh sage leaves
2 quarts ice

Heat the salt and sugar with ½ gallon of water. Add cider, vinegar, spices, remaining water and ice to food safe bucket or other large vessel. Once sugar and salt are dissolved, add to bucket with remaining ingredients. Add turkey and weigh down with a plate to keep turkey submerged. You may need a gallon freezer bag or other container to set on the plate to help weigh it down. Brine about 12 hours for a small bird, or up to 24 for a large bird. Remove bird from brine at least a couple of hours before cooking and rinse thoroughly. Refrigerate uncovered until cooking time – this will help dry out the skin so it can crisp up during roasting. You may add herbs or other spices to give the skin flavor… I used thyme, sage, pepper, and butter. Be sure to pat the skin dry before rubbing with spices.


The turkey is never complete without the cranberry sauce on the side! While canned cranberries have their place, I much prefer fresh made cranberry sauce! Here is my recipe for my Apple Cranberry Sauce.

Apple Cranberry Sauce
1 12oz bag fresh cranberries
1 ½ cups peeled and diced apple (about the same size of cranberries)
1 ¼ – 1 ½ cup sugar – to taste
1 cinnamon stick
¼ teaspoon nutmeg
1 teaspoon grated fresh ginger

Combine all ingredients in a saucepan, but start with only 1 cup of sugar. You can always add more later! Heat over medium low heat until apples are tender and cranberries have burst. Sauce will be fairly thick. Taste for sweetness, then add additional as necessary. I used about 1 1/3 cups sugar with mine batch. Stir to dissolve additional sugar, and then cool. Serve chilled or at room temperature. No thickening is necessary, as both the apples and the cranberries contain pectin that will naturally thicken the sauce!

Cranberries, apples, sugar, and aromatic spices

This cranberry sauce if so versatile! The apples absorb the colors from the cranberries and make this sauce so elegant. I love using leftovers in different ways and this cranberry sauce recipe is great in many things! Think cheesecakes, trifles, on sandwiches, pureed and used in cocktails… so many uses!
Finished Apple Cranberry Sauce

I hope you enjoy these recipes! And, thank you all for supporting me in this blogging endeavor!

Thursday, October 27, 2011

Pumpkin Spice Latte, Part 2

Since I know I can make my own latte, I decided to take the next step - make my own Spiced Pumpkin Coffee Syrup. I compared it to the store bought version, Torani, and the sweetness appears to be the same, but the flavor is much better! And, no preservatives! Here is my recipe for the syrup...

Spiced Pumpkin Coffee Syrup
2 cups sugar
1 1/2 cup water
1/4 cup canned pumpkin
1 cinnamon stick
1" square of fresh ginger
1-2 cloves
1/4 teaspoon nutmeg

In a saucepan, combine all the ingredients. Bring to a low simmer and stir to dissolve sugar. Once dissolved, simmer for an additional 2 minutes. We aren't reducing it, just steeping the spices. Remove from heat and allow to cool to room temp. Strain into a clean glass container, and store in the fridge. Make 500ML or 2 cups. For a more spicy flavor, rinse off the cinnamon stick and leave it in the syrup overnight.


One Batch of Spiced Pumpkin Coffee Syrup fits perfectly into a pint jar

So, for the price breakdown, this is much more cost efficient!

Here is what the prices are based on...

Sugar - 10lbs for $13.88
Canned Pumpkin - 15oz for $2.39
Water - free
Cinnamon Stick - 2lbs for $13.49
Fresh Ginger Root - 1lb for $3.99
Cloves - 1lb for $14.56
Nutmeg - 2.3oz for $10.56


So, for my recipe, here is the breakdown:
2 cups of sugar = 7oz -  $0.607
1/4 cup pumpkin = 2.25oz - $0.359
1 cinnamon stick= 1/8oz - $0.053
1 inch ginger = approx 1/4oz - $0.062
2 cloves = trace - $0.01
1/4 teaspoon nutmeg = 1/32oz - $0.143

Total Cost for 500ML :  $1.23
Cost for 500ML Torani Syrup:  $5.07

That is a total savings of $3.84! Think how much that would add up...
These prices were based on Amazon.com prices, but I am sure that some of this would even be cheaper in your local grocery store or Costco.

So, who says you can't make your own coffee flavoring?  This also makes a great hostess or Christmas gift for a coffee lover in your family! Try this on pancakes too...

I hope you enjoy! I'd love to hear feedback from recipes, so feel free to leave a comment on what you have tried off of my blog!

Sunday, October 23, 2011

Maple Bars

Come the fall, I tend to crave comfort foods. Homemade maple bars are definitely on that list! I make mine with a slightly sweet yeast dough that I deep fry. I top it with a creamy frosting made almost entirely from real maple syrup.

First off, here is the dough recipe... It is based loosely on a recipe from my childhood called Monkey Bread.

Maple Bar Dough
1 cup warm milk
1/3 cup sugar
1 1/2 teaspoons yeast
1/4 cup oil
1/4 cup melted butter
3 eggs
5-6 cups flour
1 teaspoon salt
2-3 quarts of mild oil, for deep frying
(peanut, canola, soybean, coconut, safflower - just make sure you are not using extra virgin, as it will likely burn)

"Bloom" (fancy word for dissolve and let it do it's thing) the yeast in the warmed milk (110 degrees). I usually allow this to sit for a good 10 minutes. Add the sugar, oil, and 2 1/2 cups of flour, and the salt. Beat well to combine, then add the eggs one at a time, beating after each addition. Add enough flour to form a smooth dough. I use my stand mixer to knead the dough, but you can do it on a lightly floured surface too. Place into a lightly oiled bowl and allow to raise in a draft free, warm place until doubled in size. Once it's raised, gently push to deflate the dough. Roll the dough out to about 1/2 - 3/4" thick, then cut into rectangles, about 3" by 4". I prefer to go smaller, then I don't feel so guilty eating them!  Allow to rest for about 10 minutes. Heat oil in a large, deep sauce pan. Make sure your pan is deep enough to only fill it 2/3 full of oil, so you don't risk overflowing the pan. Oil should be fairly hot, about 350 - 375 degrees. Drop a few dough squares at a time into hot oil. These will cook quick, so make sure you watch them. Cook about 1 minute one each side. If you aren't sure how long to cook them, just cook 1 to start with, then taste for doneness. Fry all the bars in batches, allow to cool, then frost with Maple Syrup Icing. The dough may also be divided and frozen, or baked up into a number of other items, such as dinner rolls, cinnamon rolls, or other sweet bread applications.


Fresh-made Maple Bars

And to top these off, a fantastic REAL Maple Syrup Icing. Why use maple flavoring when you can use the real stuff?

Maple Syrup Icing

1 cup of maple syrup
1/4 teaspoon milk

Bring the maple syrup and milk to a boil, and boil about 4 minutes. Pour mixture into a bowl and whip with an electric mixer until mixture is light colored and thickened. If icing gets too thick, just add a little more maple syrup. This icing will dry out as it sits and thicken dramatically, so try to use the icing soon after it's made. Remember, this is fairly sweet, so you don't need much on the maple bars.


Maple Bars

Saturday, October 8, 2011

Tomato Basil Quinoa

It was recently requested that I come up with some recipes using quinoa. What is quinoa? It is an ancient seed, full of fiber and protein. It is related to spinach and chard and is native to the Andes mountain region of South America. It comes in several colors: red, yellow, brown, black, and ivory. Quinoa is coated in a bitter powder and must be rinsed before cooking, otherwise your whole pot of quinoa will be bitter.

Tomato Basil Quinoa
1 1/2 cups rinsed quinoa
3/4 cup tomato sauce
2 1/2 cups water or chicken or vegetable stock
1/2 teaspoon basil
Pinch of salt
Black pepper
Fresh ribbons of basil, for topping

Combine quinoa, tomato sauce, water, dry basil, salt and pepper. Cook over medium-low heat for approximately 25 minutes, until all the liquid is absorbed and the "tail" of the quinoa has broken free of the seed. You will see little while "commas" in the pan. Fluff with a fork, transfer to serving bowl and top with fresh basil. This pairs well with almost any meal! If desired, grate a little parmesan, pecorino, or ricotta salata over the top for a salty kick.
Tomato Basil Quinoa

Friday, October 7, 2011

The Beauty of Canning Season

With bountiful harvest, comes all the work of preserving it. Sometimes, admittedly, it's tough to stay motivated. Once all the jars begin to stack up, I get a real sense of accomplishment! How much money I saved by making my own and how much better it is for my family are two of the best reasons! The fact they look beautiful - just a bonus.
One thing I experimented with this year was Yellow Tomato Sauce, made from "Lemon Drop" Heirloom tomatoes. It turned out so sweet! And, as a bonus, it's a gorgeous golden color! I thought I would share a picture of some of my work, it truly gives me joy to see all the delicious stuff that I get to enjoy this winter!

San Marzano Roma Tomato Sauce, "Lemon Drop" Tomato Sauce,
and Home-Grown French Cut Green Beans